
Installation - No Tools, Nuts, Bolts Needed
Installing the Ensven smart, modular bedrocker doesn’t require any tools. Simply lift your bed, or other furniture, on the Ensven pads, one at a time. Once installed, Ensven can be controlled via Web-App and via a simple one-button remote control.

Fits Nearly All Beds

The active Ensven pad is at the bottom left bed leg.

The active Ensven pad is at the center leg of the bed.
Most beds can simply be lifted onto the Ensven pads, one foot on one pad at a time.
Center each foot of the bed on Ensven's platform.
Make sure the Ensven modules are parallel to each other. The straight edges of the Ensven modules help with alignment relative to each other, and relative to walls.
Use the configurable snap-on platform fence to adjust each platform to the legs of the bed, if needed.
If your bed has more than 4 legs, simply get additional un-powered pads.
Regardless of the number of feet, each Ensven configuration has one powered pad that provides the actual motion.
All other pads are passive and balance out the bed's weight, allowing for near friction-less and silent movement.
Ensven is near maintenance free.
Details

The possible linear motion on the passive pads is longer than on the active pad. Yet, centering the moveable platforms helps Ensven run smoothly, without bumping into end points.
The passive pads are smaller than the active pad. Centering the platform is straightforward, just put it in the middle. The stretchy fabric naturally “wants” to pull the platform into the center.
The active pad is longer than the passive pads and the centered position is not in the middle. Center the platform as shown in the picture with the red line. Use the small slot in the fabric on one of the long sides as a marker.
Peel off the slippery plastic cover to expose the non-slip rubber surface of the moveable platform underneath.
Safety

Ensven’s electrical and electronic components are UL, FCC and CE certified.
Human feet are protected by sloped walls that prevent injury.
Even tiny fingers can't get trapped in the tight 3/32 inch (2mm) gap between movable platform and housing.
Ensven has a stall guard function. When motion is blocked, the Ensven powered module disengages. It will attempt to re-engage 3 times, before stopping completely. Nevertheless, please leave sufficient space between your bed and the wall toward which Ensven is moving during rocking motion.
Please do not place anything on top of any of the Ensven pads (other than the bed).
Make sure the motion of the bed itself is not restricted by items around the bed, e.g. funiture.
Web-App

Use the Web-App to set up sleep parameters and fully control Ensven. You can run it on any device that is wifi capable, e.g. smart phone, laptop, tablet, desktop.
The maximum speed of one oscillation every 4 seconds is a recommended setting. Yet, some people prefer a slower motion.
Ensven can be set to automatically start rocking if it senses a certain amount of motion from the bed, and hence the sleeper(s), indicating sleep disturbance. A sensitivity close to 100% starts Ensven up when very small motions are sensed. Set sensitivity to 0% to switch this feature off.
Duration changes how long Ensven will rock the bed before stopping, and optionally standing by for auto-start. The deepest sleep phases happen in the first half of the night and we hence recommend to set duration to between 2 and 4 hours to support falling asleep, and being especially deeply asleep during the first few hours of sleep.
The Start/Stop button allows you to start or stop Ensven manually.
Ensven connects to a wifi hotspot via the settings tab and can then be set to be accessible by more than one smart phone. This is useful if there is more than one person in a bed, or for parents who want to control the Ensven units under their baby's crib.
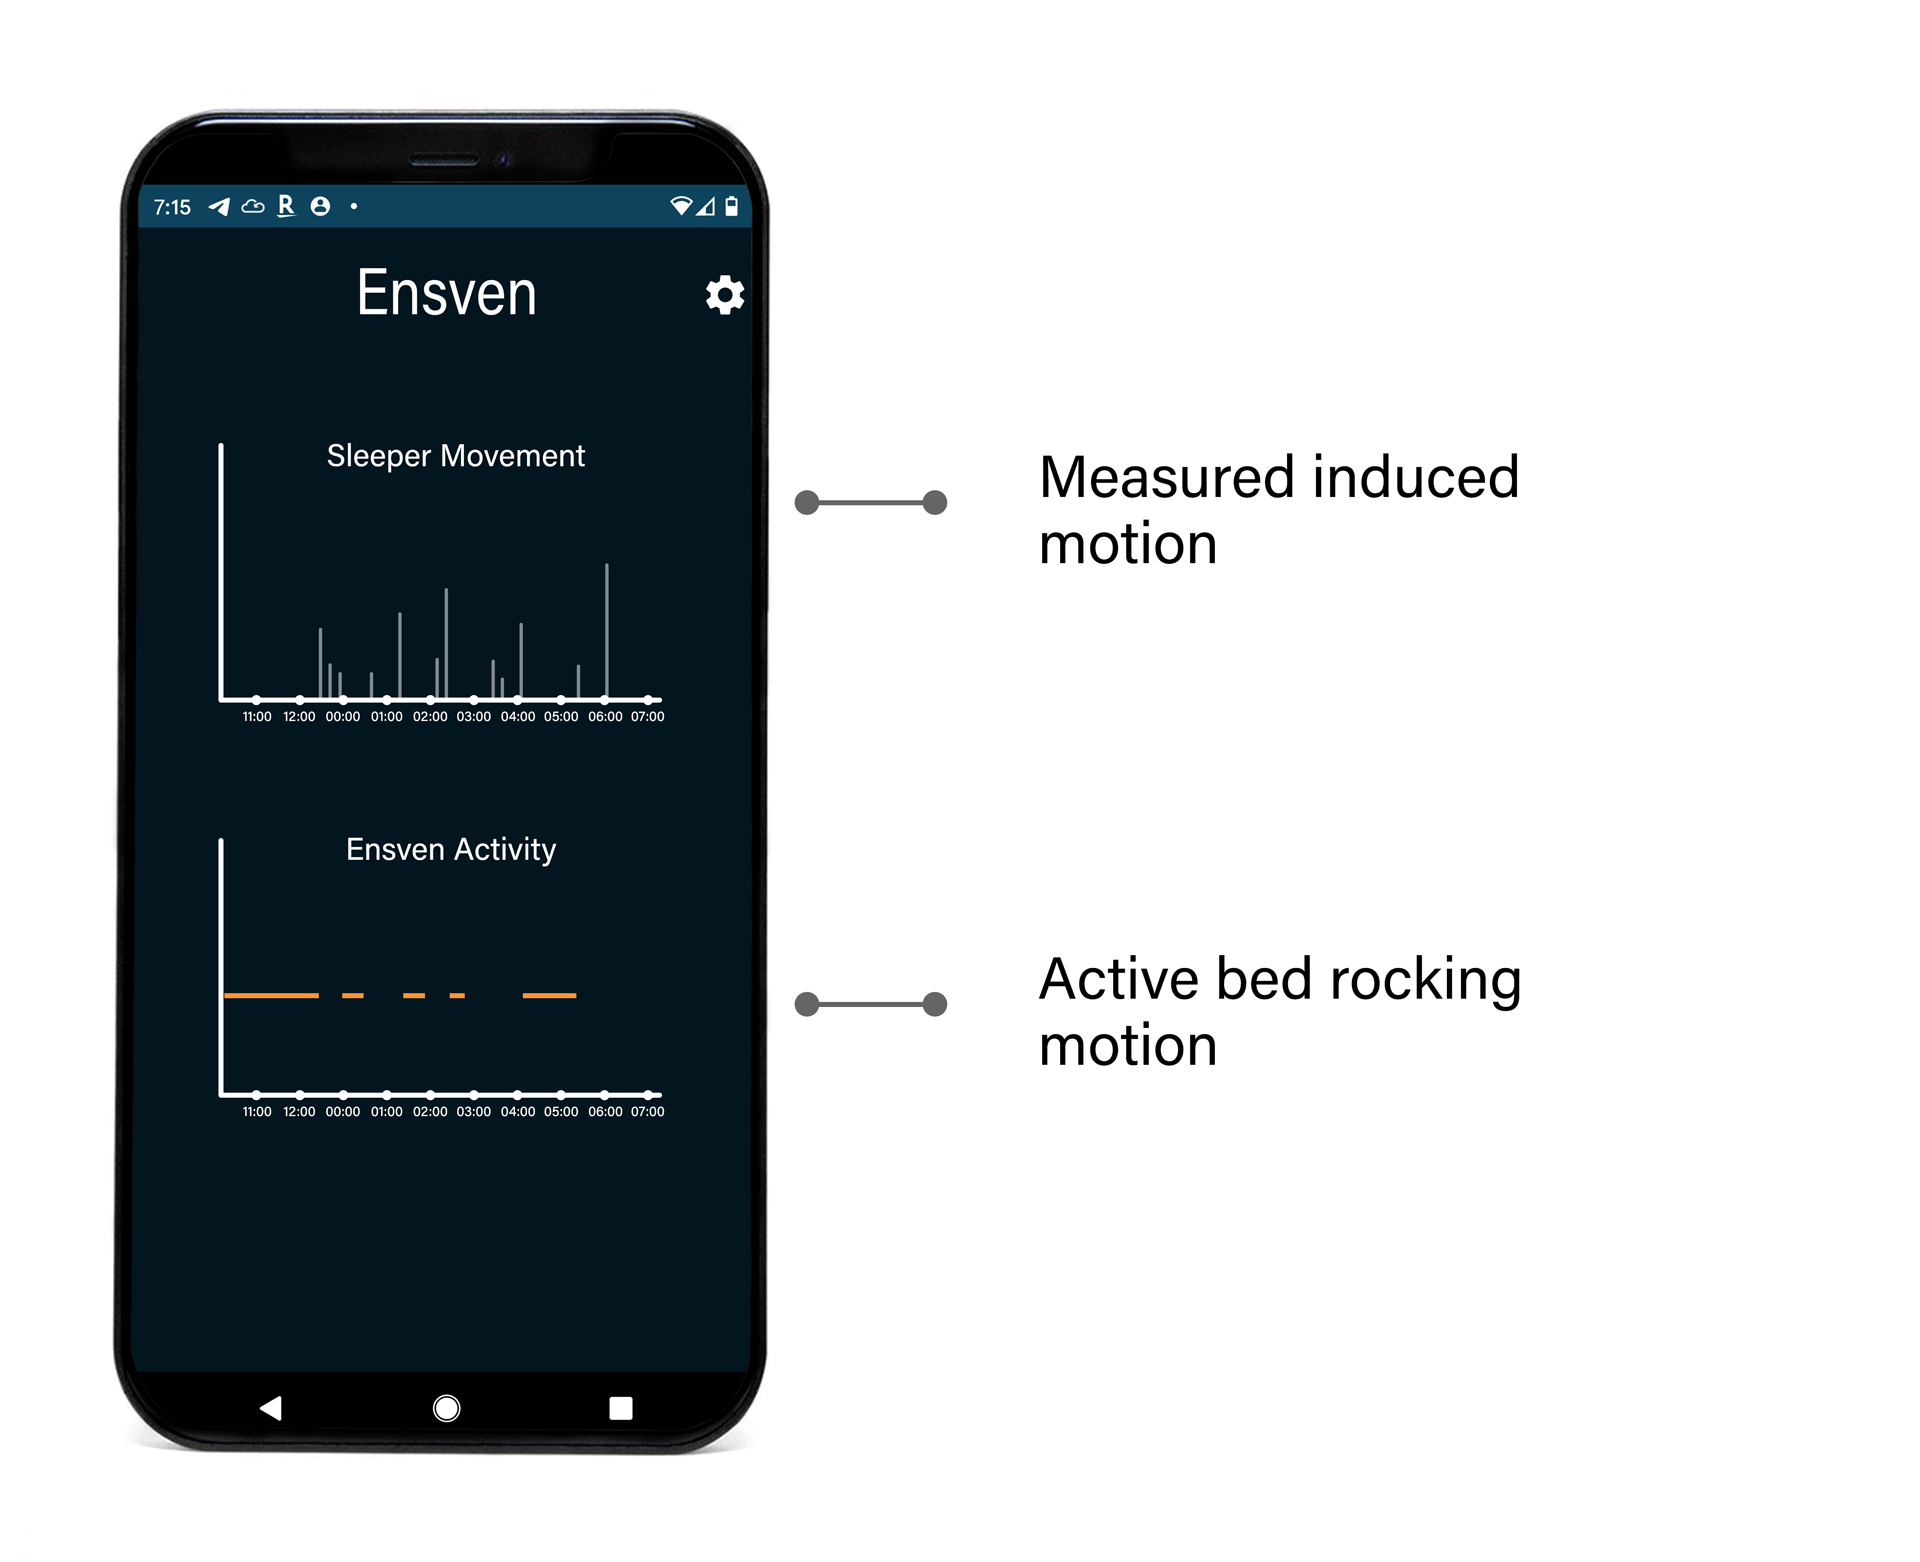
The App also allows you to access analytical data taken by Ensven during the night, namely from its in-built accelerometer, to show how solidly you have been sleeping, and how Ensven responded to movement during the night.
Advanced Parameters
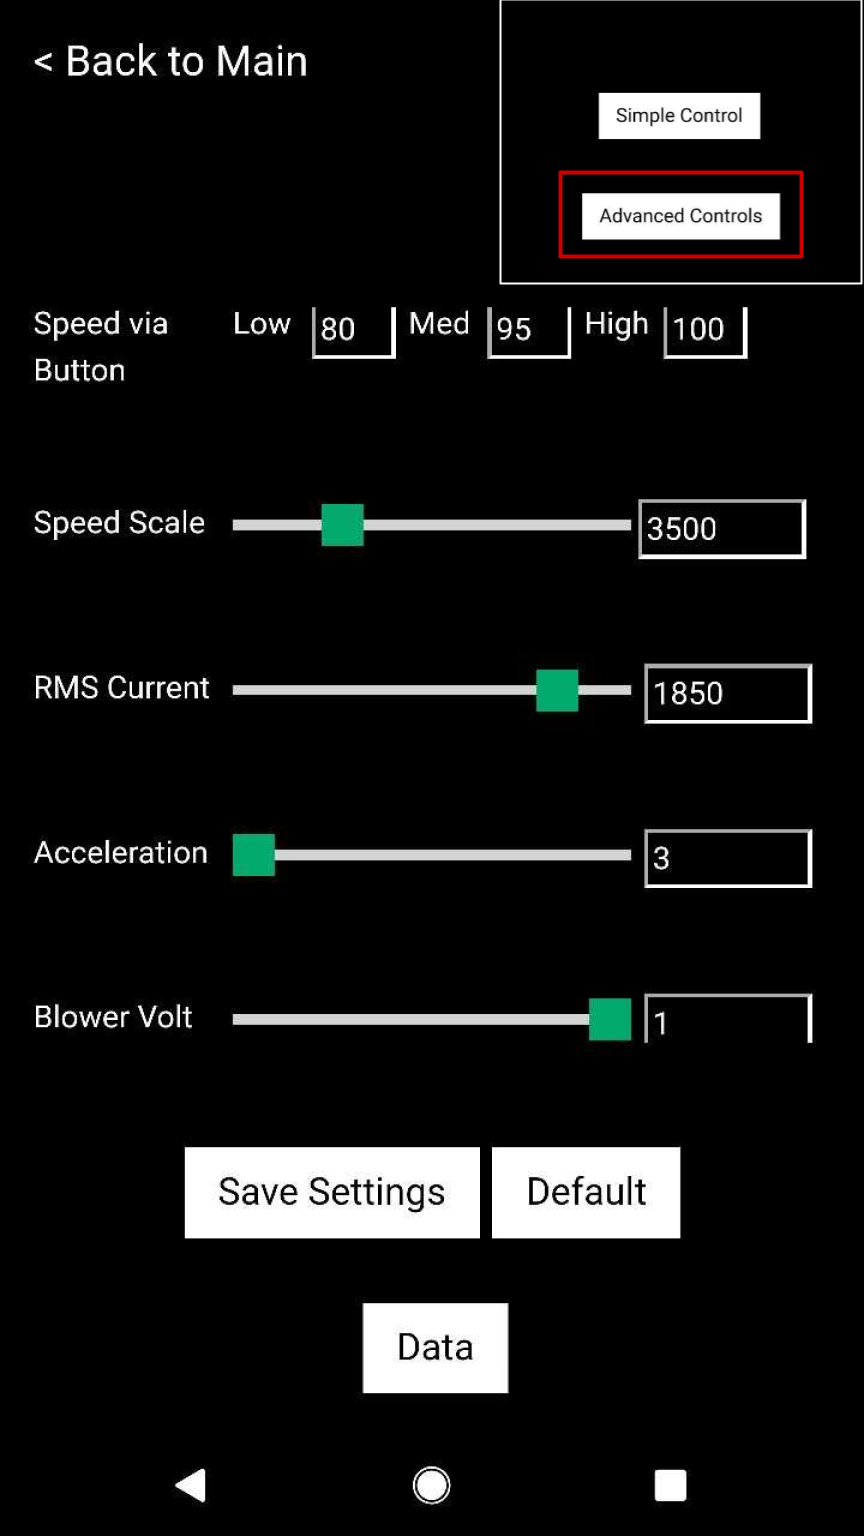
Speed via Button - Low Med and High settings. Default: 80, 90 and 100
Speed Scale - Default: 3000, higher values increase relative speed but lower power a little
RMS Current - Default: 1850
Acceleration - Time (in seconds) from 0 speed to target speed and/or target speed to 0 when stopping. Lower time means quicker acceleration. Default: 3
Blower Volt - Default: 1; if set to 0 then the internal blowers come on less often
Stall Time - Time (in seconds) that Ensven is stalled before auto switching off for protection, Default: 3
Stall G Limit - Larger values engage the stall protection sooner than smaller values. Set to 0 to switch stall protection off, Default: 0.02
MPU Idle Time - Time (in seconds) that Ensven remains idle after a stall protection event, Default: 3
Overheat Time - Time (in minutes) that Ensven remains idle after an overheating event, Default: 15
Stall Time - Time (in minutes) that Ensven remains idle after having stalled 3 times in a row, Default: 15
T Limit - Temperature (in C) limit that will lead to Ensven switching off, Default: 50C (122F)
Accel Axis - Technical parameter related to stall protection and autostart, Default: X
Gyro Axis - Technical parameter related to stall protection and autostart, Default: Y
Microstep - Technical Parameter, Default: 8 , higher values lead to slower speed
Thermal Sensor - Switches the on board thermal sensor on or off, Default: ON
Thermal Device - Chooses which thermal sensor is used, Default: Thermistor